In the blog about leather webbing I ended with a challenge to readers to make a reproduction of the Oliver Pattern water bottle carrier. I would like to post everyone's version. Check the challenge here:
This is a new challenge to make the Ross bayonet scabbard and frog. I have an original so one might wonder why I would want a reproduction. First off having one would be consistent with a reproduction uniform, and also it's a better idea to leave a fragile original at home. But secondly the requirements of reproductions lead to a deeper understanding of the structure and methods used in producing originals.
Here is the original:

The scabbard and frog are joined by a staple on the back and cannot be easily separated.
I started by creating a paper pattern. The measurements are indicated here for the challenge.

I guess the leather to be 7-8 ounce or 7/64" to 8/64" thick. What I used was 8-9 ounce and it was too heavy. It is an unyielding tooling leather best worked after a short soaking. But be careful as the wet leather quickly takes on a stain from its interaction with steel tools.
The paper pattern for the scabbard was transfered to the leather and holes were marked and pricked through. This picture shows the inner, or flesh side, of the leather. I put a slice into the edge 3/16" in, my hope being the leather would bend more easily as I had to work it. Later, as I found my leather hard to sew, I was driven to use a drill press to pre-drill the holes. I remain amazed at how sewing machines pump through this stuff. That being said I believe the last stitches on the scabbard were done by hand.

In this next photo I have cut back to the line on the section that will be hidden by the frog. The stitching has started. See how I have wetted the leather and bent it and folded it onto itself.

I work the stitches down to the far end. It looks as though I'm making a sheath from the Wild West but the next stage is to flatten the wet scabbard onto itself from a 90 degree direction as can be seen in the second photo.


At this point it is necessary to force the pliable leather into its shape, and especially to work the seam. As I did this, and reflected on the originals, I wondered what steel forms they must have had to make this work easy. Studying the original stitching I could see machine marks to the curve. From then on it might have been sewn by hand. The originals also have metal components at either end which I'll speak of later. These are more than I can do in this reproduction. I have also completed a herring bone stitch in the section to be covered by the frog. This is not a part of the original as you will see.
I put this away to dry and then started the frog.
The frog uses the same leather and similarly I ended up working it wet. Here is the paper pattern.

And here is the pattern transfered to the leather which is cut out and pricked through.

The belt loop gets sewn first. The wavy end is my bad cutting as I tried to skive, or taper, the end of the piece. This will be hidden though.

The "T" end of this piece has a subtle curve because the frog tapers slightly to accomodate the skived belt loop end.

I determined the next hole placements after wrapping the wet leather around the scabbard. In the making of these there are judgement calls based on working the leather into its proper shape. It's hard to specify exact measures. Much depends on the nature of the leather used. It's also easier to work around a Ross bayonet and the completed scabbard to be sure of the fit and to make adaptations.

The next step was to sew the frog together hoping it would end up neither too tight nor too loose. In the end on this one I was tight, but not too tight. The last stitches are figure-eights.

After the sewing was completed I trimmed the leather back close to the stitches.

While it was still wet I stretched the frog with pliers and so was able to insert the scabbard.

To all intents an purposes the scabbard and frog are finished. After they dry I can wax them and put a metal cap over the tip which will be cut off square. Leave your last stitches about a quarter of an inch short of the end. The tip in this reproduction is a large well crowned thumb tack. Then I finish off with a wire staple to join the two parts and a rough cut hole to hang the bayonet on a nail, just as seems to have been done in the trenches.


The finished scabbard and frog look perfect but they are missing the vital metal components. Thus they are evocative reproductions only. I knew I couldn't reproduce the internal metal parts but I figured I could do my best to draw them. And as I peered inside the scabbard and checked the tip with a magnet I was over taken by a wish to get to the root of the matter. At least, I felt, I could pull the staple and separate the two parts. And so I did. This is what I saw after the scabbard came free of the frog.

And when I removed a hidden staple on the other side I found this:

Looking inside the removed metal sheath reveals the workings of two spring plates designed to secure the bayonet.

In the end these revised drawings show the overall workings of the original.


I see now I've drawn my small studs in a reverse to the artifact. So much fo the eye witness! I'll have to correct that!...."Did the witness see the double studs at the top or the bottom?" ..."The bottom your honour"...."GUILTY of gross neglect of observation!"


I now feel thoroughly knowledgable of the workings at this end of the Ross bayonet, but the true nature of the metal insert and domed tip that give form to the bottom end remain a mystery. The drawing is my best guess. The staples, by the way, get banged in through the leather and the holes in the steel and bend against a hard steel insert in what ever way they please. It seems crude but it held this scabbard and frog as one for 100 years. I put it back together easily after I'd taken the photos. The thing to remember is that the scabbard is simply a protective sleeve. The real holding power is in the metal device held by the frog.
Here are the staples.


Incidentally, the messtin is made of old fabric, plywood, sheet steel, and hot glue. Sometimes the theatre prop approach can be quite effective.
February update.
A blog reader contacted me and we got together to compare notes. He has lent me his very dead scabbard. With his permission I have removed the bottom metal piece. Here it is:
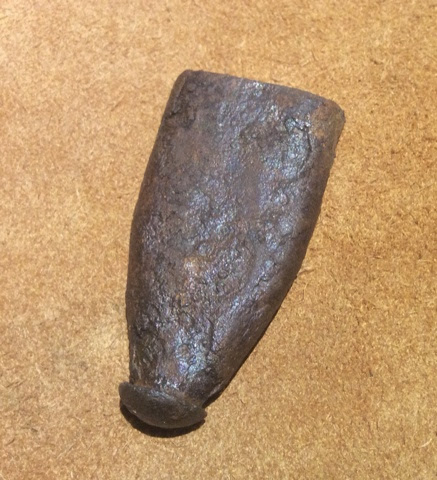


It seems, at first inspection, to be made of two pieces with the end nub riveted in place. I shall make new leatherwork around this to restore it and get a sense of "how?"
The upper metal parts are braised I think.

I have an original scabbard as well but no frog. The upper metal scabbard throat is indeed brazed.
ReplyDelete