Friday 27 March 2015

Reproduction First World War Canadian Badges

I have finally got more badges made!


First off are my original set, the 21st Battalion cap badge and the Princess Patricia's Canadian Light Infantry Marguerite:


Both are cast in brass from originals. They have lugs on the back. The prices are $ 30.00 and 
$ 40.00 respectively.

New to the line up are the standard "CANADA" shoulder titles. Price $ 30.00 a pair.


I've also made Canadian Medical Corps collar dogs at $ 35.00 a pair, and a Medical Corps cap badge for $ 45.00 with a pin fastening. The silvering is done with an imitation silver leaf.


Newly minted is the Royal Newfoundland Regiment cap badge at $30.00


Lastly, and certainly not least, is the Canadian Nurses' buckle, being sold for  $ 110.00. Again silvering is done with imitation leaf. I have not done a gilt application. In the long run I hope to be able to provide the leather belt to go with it.


To purchase these items contact me at :

timothyjsoper@gmail.com 

Payment can be made through PayPal. No taxes are being charged yet but delivery in Canada will be $5.00 for a single badge by Canada Post. Several badges can be sent for less than $ 10.00. The belt buckle would be around that much too.


Sunday 8 March 2015

Fitting Instructions: Puttees

The one constant an all these uniforms is the use of puttees. Puttees were invented in India and adopted by the British, and subsequently by other armies. I've never tied mine properly because I never found out how. 


So I did a google search and came up with this video. Need I say more?

Wednesday 18 February 2015

Fitting Instructions: Canadian 1916 Dismounted

After struggling with the Oliver Pattern the 1916 pattern is such a relief of good sense that it hardly seems necessary to give fitting instructions.... but here goes.

As with all the other gear the belt must be fitted first, snug around the waist at the belly button. The yoke system is much saner and a more comfortable fit than the other Canadian systems.  It needs to be attached so that the strap lengths allow the yoke to curve around the shoulders beneath the collar. This will take a bit of trial and error. 


The front straps can be attached to the belt without the ammunition pouches, but ultimately the ammo pouches will be fitted on and the straps passed through the rectangular loops on the pouches themselves. I find it's best not to pass the strap through the pouch loops and the belt loops as the pouch will tend to flop forward.


Once the yoke and belt are set up the other gear can be added. The water canteen hangs snapped on the right, the bayonet frog will be threaded on the left, and the haversack can be buckled over it. 


The large pack is a bit more of a contraption with its crossing backs straps to cinch everything in place. First it must be buckled on over the shoulders. 


Then the bottom loops with the studs secure it to the belt. 


Finally the crossing straps are tightened and buckled to the bottom straps. 


This whole system makes sense as a means of putting on or taking off the large pack without assistance. With supple arms and minor contortions even the lower straps can be worked. Similarly the canteen is more readily removed for a drink. Much more thought has gone into the 1916 equipment with regard to ease of wearing and adjusting. 

The ammo pouches are flawed, however, because the belt loops are held by studs that work loose in their holes and the effort to open and close the pouch flap with the buckled extensions is laborious. It seems, again, that the Victorian origins are too dominant and what may look smart doesn't quite cut it.


Sunday 1 February 2015

Fitting Instructions: Canadian1915 Pattern

The Canadian 1915 pattern equipment is the old Oliver Pattern reworked and improved. Gone are the 1" backward leading front straps, and the forward leading rear straps stay where they belong...in the back. It is a simpler system and can be put on like a vest, just as the P'08.


As with all this webbing the first thing to do is to tighten the belt to a snug fit around the waist at the belly button. Then the yoke can be attached. And again, as with the other systems, the adjustment of the yoke is a matter of trial and error until the yoke fits so as to support the belt and its eventual loads. Since the yoke curves around the back care must be taken that it will not be so placed as to droop backwards nor cut forwards into the neck. The sweet point is that it curve to the line of the collar edge.

Fastening to the front initially is an easy matter of snapping the hooks into the rings on the belt. The rear attachment is achieved by first putting the "billets" onto the belt. These are short buckled straps that go around the belt and attach to themselves. The one on the right passes through the strap riveted to the belt. The one on the left may end up passing behind the belt's adjustment buckle. The two rear 3/4" belts coming off the back of the yoke attach to these sharing the buckles on the billets.


Once adjustment is completed the next task is to slide on the other components of the gear in their correct order and orientation.

If the blanket straps are to be worn they go on first left and right, their buckles upward and the rough flesh side of the leather facing out.

The other items are as follow: on the left side the Ross scabbard and then the ammunition pouch. On the right side the MacAdam shovel strap and then the ammunition pouch. The shovel strap can be put on afterwards too. I have it placed backwards here thus proving that it can be confusing. Everything is most easily assembled lying on its face or back.


Last of all comes the haversack. This gets strapped on straddling the bayonet, its 2" straps on either side. There's just room enough.


The large pack can be put on afterwards, buckled at the top, and with its small bottom buckles below looping around the belt. The last details of the belt attachment I don't know of for sure but this all makes sense as far as I can determine from old photos. The next photo is from an original fitting instruction book and the one following it is my own. The bayonet is incorrectly placed outside the haversack in the old photo, a point acknowledged in their text as being done to illustrate the bayonet in subsequent photos.


The carrying of a blanket and ground sheet, or a great coat, makes use of the remaining straps. These buckle the roll tightly to the belt


The following old photo shows the roll from the other side. Notice the haversack hung in this arrangement from the shoulder buckles. Also the handle of the MacAdam shovel shows itself, the strap looped through the sighting hole.


As for the water canteen it seems variously worn on its strap under the webbing or over it. I don't know what was done with the mess tin.


The following photos show the 1915 webbing in use. Note the placement of the components. Also note the excruciating undercutting of the ribs of the poor soldier in the last photo. He seems to be without ammunition pouches, and so without the counterweight of bullets the belt is pulled up by the yoke. The countryside is Ontario and he need not fear the war yet. When he makes it to the Western Front he will not be wearing this equipment.


These soldiers above are wearing modified Oliver Pattern ammunition pouches.


This equipment is all being reproduced by What Price Glory and should be available for sale soon.

Keep checking:


                      http://onlinemilitaria.net/shopaff.asp?affid=1497


Saturday 24 January 2015

Fitting Instructions: Oliver Pattern


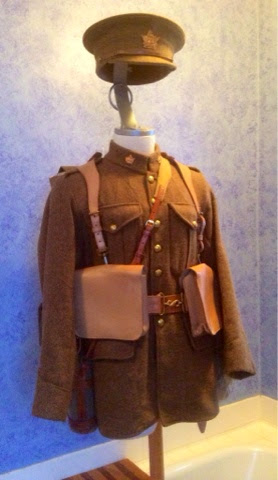
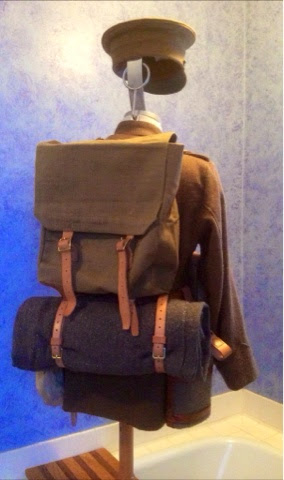
The Oliver Pattern is a complex tangle. When it's together its a devil to put on, but when it's on, as long as it's not heavily loaded, it's a smart looking set.

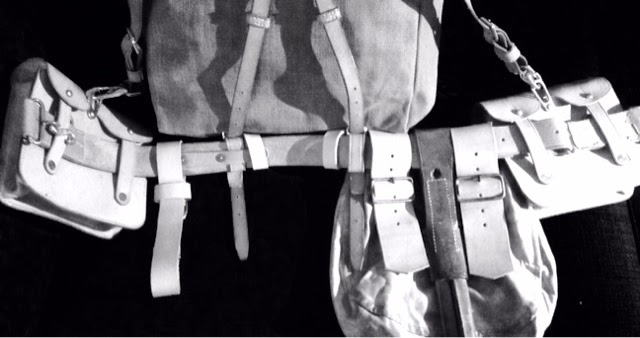
To start the belt must be adjusted to be worn to a comfortably tight fit around the belly button. The yoke and its buckled ends will have to be adjusted to this position which might take repeated takings on and off until all is right.

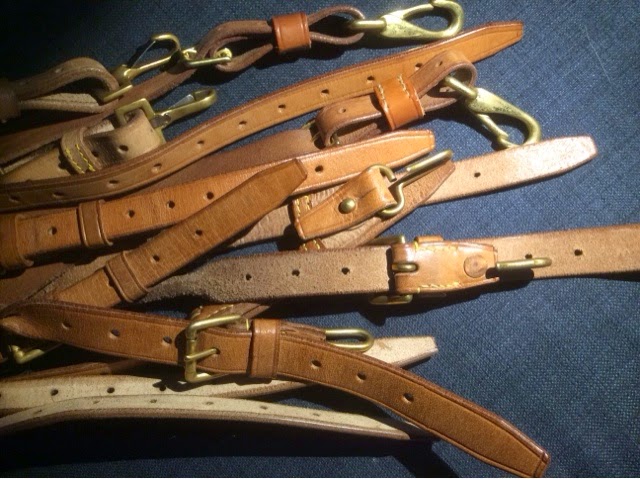
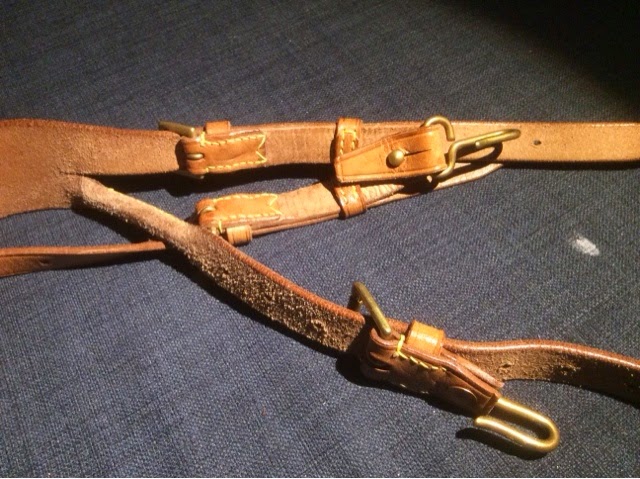
The yoke divides and splits into six straps. The inner of the forward leading straps (3/4") buckles to a "Y" strap. The backward leading 3/4" strap also connects to the other side of the "Y".


 These two now united as a pair will hook on the two "O" rings on the belt or onto the loops on the ammunition pouch.

The 1” forward strap will lead backwards and buckle onto its own short strap and hook onto the valise. The valise is to be used as the Boer War option, while a great coat roll strap is required as the attachment point for the Great War variation. In both cases the valise or the great coat straps will have the belt threaded through them.


The yoke and its straps can be attached to the belt once the valise or great coat roll are in place. It is a challenge to put the assembly on and may require assistance. If the hooks are too open they might come unhooked. It may be necessary to squeeze the hooks closed so they are slightly tight to engage. At any rate, keep adjusting until all seems balanced for tension. If the fit is right it should be near impossible to get out of the equipment.


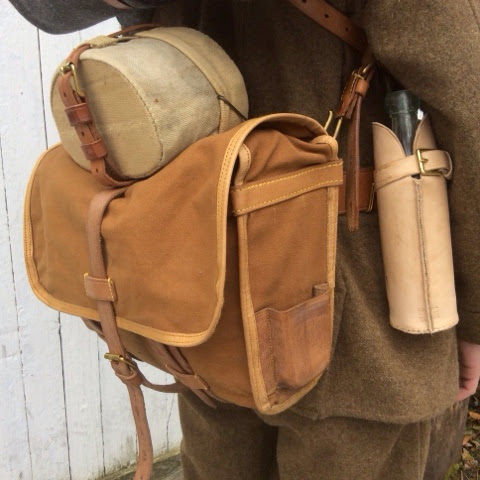
Having adjusted the straps the other components can be added. This would be the bayonet frog and the water bottle for the Boer War option. 

The ammunition pouch is more easily added after everything is in place and on the body. It may take some work to loosen the leather so it can be threaded on a belt end. Ultimately it is pulled back to cover the buckle and the forward straps can be attached to it. Alternatively I've seen it set to the right side leaving the belt buckle exposed. This has a certain practical efficiency which may have been discovered by the men who were forced to wear the equipment, and not planned or permitted by those who made them wear it.

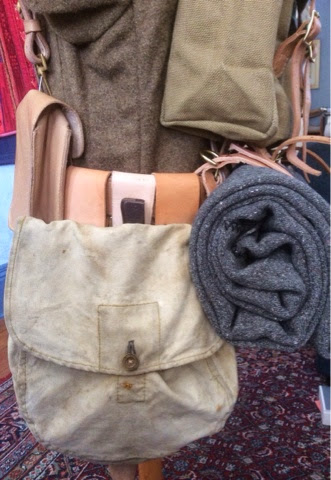
The valise can also take the mess tin. It is possible to use the valise straps to snug down the mess tin handle. An extra belt improves the situation. This belt can pass through a central leather lead on top of the valise. 


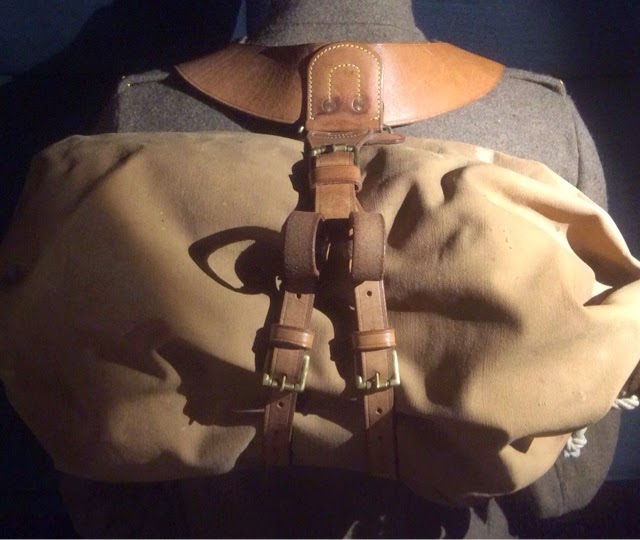
Also to be worn is the large "Y" strap assembly, called a "cape brace", which passes through the big loop at the middle of the yoke and the keepers on the rear straps. This variously binds and attaches blankets, ground sheets, great coats, and kit bags. The use with a kit bag seems to be the Great War option when the valise has been dispensed with and the blanket roll has taken its place.


Don't forget, all this equipment is available at What Price Glory. Here's the link to use:

                      http://onlinemilitaria.net/shopaff.asp?affid=1497

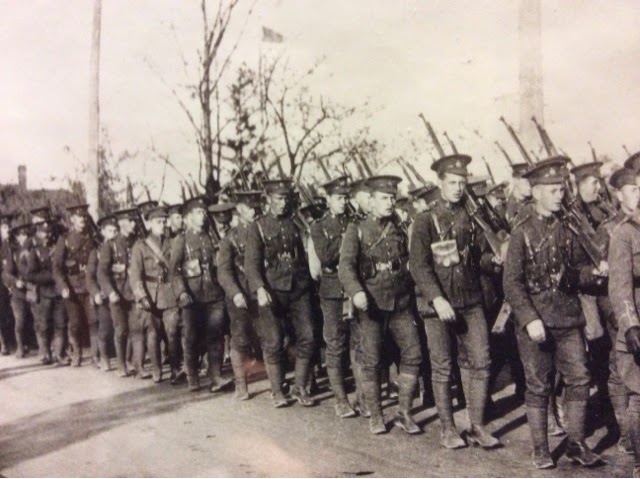
This photo, below, is in Kingston in the winter of 1915. The soldiers departed for the Western Front in May of that year. Three quarters of the city turned out to watch 1000 men leave. We will commemorate this and the departure of the Queen's University Stationary Hospital Corps in May 2015. See my blog on Great War commemorations.


Another part of the gear is the haversack, worn on the left side under all the leather webbing. If it's empty it can be rolled up and the flap fastens on the rear button to make a kind of sausage roll.


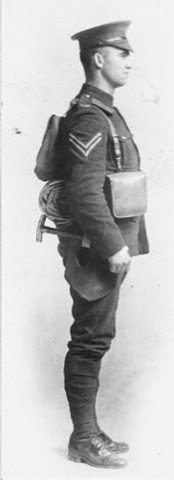
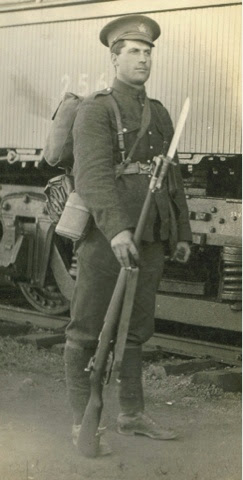
In the Boer War the glass bottle was ceremoniously smashed and replaced with a British tin canteen. By the Great War this canteen was now the classic kidney shape on a sling. The canteen was worn both under and over the leather strapping. Certainly it was easier to get at if it was on top. This photo, taken in England, shows the canteen variously accessible and under a strap.


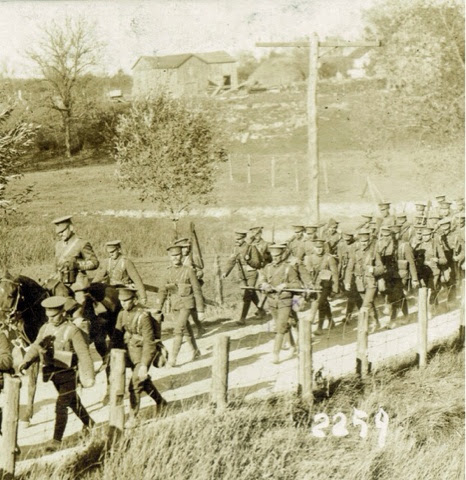
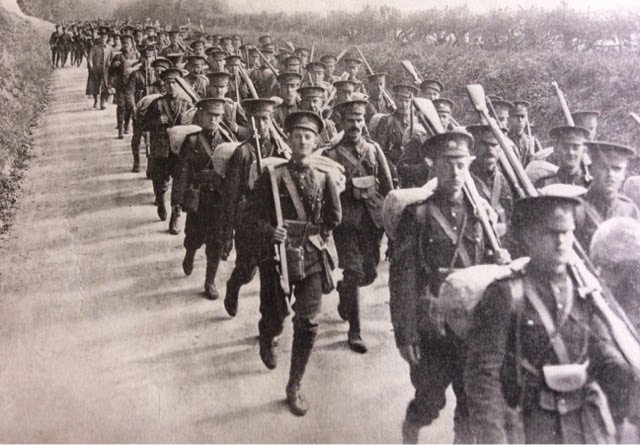
These old photos give an insight into the real uses of the equipment. In the Great War the Oliver Pattern was never used in action. Below, on Salisbury Plain, the "cape brace" is seen on some and not others, while one man's mess tin has completely slipped.


Here, below, another option for the ammo pouch means it's actually accessible.


And note in this last photo just how high everything is worn.